lundi 15 avril 2024

8 Ports USB Midi interface.

This topic is a very long-standing one for me. I must have started thinking about it in the early 90s. At the time, the power of microcontrollers did not allow the development of complex systems. I then remember having developed a 68000 system to manage the 8 MIDI ports. I never created this system because I realized that it was far too complex to create and therefore necessarily too expensive.

10 years later, at the beginning of the 2000s, things improved in terms of the possibilities of embedded systems. So I tried to create this multi MIDI port using a micro-controller. I almost got there, but ran into a small problem, it was still difficult to find a circuit offering 8 serial ports and fast enough to manage them.

Everything changed in the early 2010s. At that time, it became possible to find a micro-controller circuit with 8 serial ports and enough power to manage everything. It was then that I looked into ARM type circuits from STmicro. From that point on, the problem shifted from the hardware to myself. In fact, in view of the possibilities of the new circuits, I wanted to add a whole bunch of functionalities, including USB bus management. Then, I entered into a spiral of redefining the functions of the object which, constantly, made me experiment with various solutions, all nevertheless unsatisfactory in my eyes. Unsatisfactory, because of the poorly defined hardware, and/or the software functionalities, which are also poorly chosen.

But, this series of failures allowed me to test a lot of solutions. And, a few days ago, as I was rearranging my stack of synths and rewiring everything, the obvious solution dawned on me. Now, right away, I saw very clearly what system I needed to have on hand to allow me to easily and flexibly wire all of my machines. I also realized that I wasn't far from the real subject, in fact. And that I just had to use all my previous developments and my previous ideas to achieve what I needed.

First, create not a hub or a switch, but simply an 8-port MIDI interface. I already have the prototype almost available. I just need to make some minor modifications to allow my 8 ports prototype to be connected to the USB port. So I have just made the necessary modifications to the circuit. 

The general idea is that it should remain simple to achieve. Thanks to the experience acquired with RISC-V processors during my previous work, I left with this type of processor :

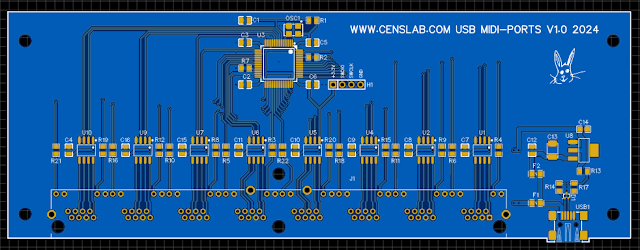
It's a fact, the printed circuit board does not seem very complicated to make. Once the components are implemented, it should look like this:


As you might expect, the MIDI connectors are not shown in this 3D view. In fact, it is not standard MIDI connectors but RJ45 connectors that are used. This is a particular characteristic of my system.
 
The difficulty for me is not the creation of the card but its programming. Working with the USB bus is not always easy. Fortunately, a few years ago I implemented a 2-port MIDI interface on a USB port using an ARM microcontroller from STmicro. So I have a software base, I'm not starting from scratch. Even if this does not guarantee that I will reach the end, I also have no means of debugging the USB bus, I am relying on the experience acquired to complete this subject.
 

vendredi 12 avril 2024

A MSX flash cartridge downloadable from USB : the last iteration.


What is it about this time?


  • I did some redrawing work on certain tracks to make them more 'homogeneous'.

  • I powered certain interface circuits directly via the +5V power supply from the MSX connector and no longer with the 3.3V coming from the 5V USB to 3.3V régulator. the goal being to avoid electrical level problems with the test machine, a Panasonic FS-A1. In theory, 3.3V interfacing should not pose any problems, but in reality, it does.

  • And, I also added a small HF remote control module. This involves controlling remotely and without a physical link, an electrical outlet to automatically restart the MSX computer without having to manipulate the main switch, nor having to 'fiddle' with a RESET connection inside the computer. MSX. 


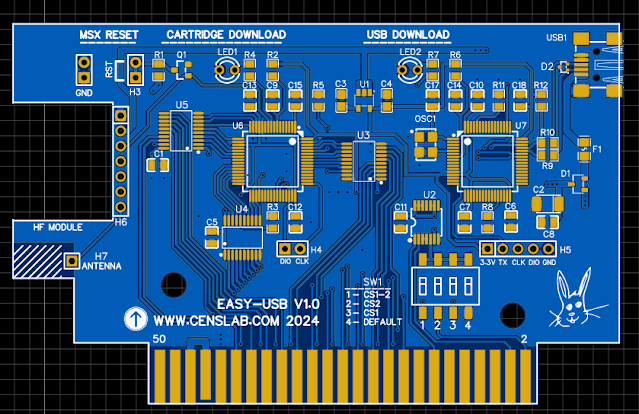
The final circuit should look like this :


Apart from the location of the HF module, the circuit looks almost the same as the previous version. Having written this, I also adjusted the external dimensions of the card so that insertion into the MSX connector no longer presents any potential gaps.

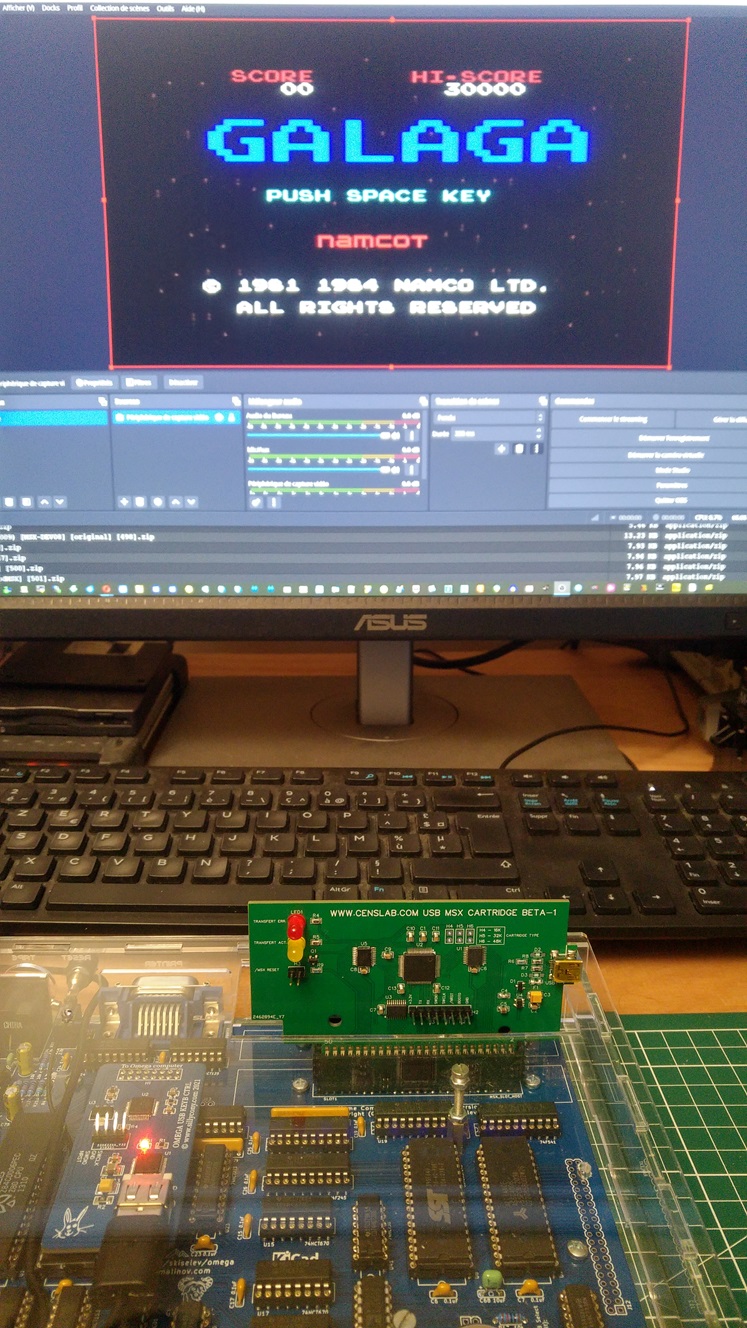
The final appearance should look very similar to this:


As for the code, the two programs concerning the processor which takes care of the USB communication and the one which manages the MSX bus, should not be modified. From the tests done, loading and making the loaded ROM available for the MSX computer works fine now.

mardi 26 mars 2024

A MSX flash cartridge downloadable from USB.


We have to be honest, developing quality equipment is not easy. Downloading a cartridge directly via the USB port from your PC to the MSX computer without any manipulation to do is a good idea.

But we must recognize that it is not done like that! I had to overcome hardware problems, software problems, implementation and component supply problems, etc. etc. 

Fortunately, most difficulties come from not having in-depth knowledge of the issues encountered. This is the study side of 'study and development'. We're getting there but it takes time.

So, after a certain number of prototypes, more and more functional, I am now arriving at the 'final touches'.

What is it about? In fact, with the idea of ​​making the loading and restarting process of the MSX computer automatic, just after copying/pasting a ROM file, you have to... restart the computer.

In 'real' life, a computer requires a power off/on sequence to restart on a new cartridge. This is not very practical. So I had the idea of ​​equipping my cartridge with a RESET signal output for the MSX computer.

Subsequently, it did not pose a problem for me to locate the right place on the OMEGA board to force the reset of the MSX computer.

But... that's not the case for everyone. And truth be told, I don't know many people who want to open up their MSX computer to solder somewhere a 'wire' from the outside.

In fact, you have to 'simulate' the action of the ON/OFF button on the computer. Again, there is no question of 'fiddling' with the computer switch. A relatively simple solution therefore consists of making a remote controllable electrical outlet. Obviously, there can be no question of connecting the MSX cartridge to an electrical outlet in any way.

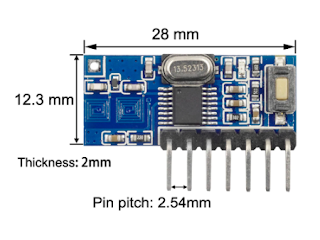
A possible and elegant solution to this problem is to use an HF link. There is no question here of using a complicated or expensive module but rather a basic 'thing' capable of just remote control something.

After some research, I came across these modules:


I ran some link tests. It works really well. So, and as the emission module is very small, I decided to integrate it into my cartridge. In the end it gives this:


All I have to do now is have a few copies of this new version of the cartridge made. Of course, you will also have to make the 'famous' electrical outlet. I have some ideas for making such a socket 'easily' and very simple to operate, while still being safe to use.

Well, I have the impression of building a castle, but, even if it sometimes happens to have difficulty moving forward in the face of difficulties, it is clear that the subject is progressing and that it works better and better, which provides some satisfaction! 

jeudi 29 février 2024

8 outputs MIDI CV/GATE converter : come back from long months of development!

Yes, because when I started this project, I thought I would create a minimal and fairly precise circuit, let's say, easily.

However, during the entire development, testing and modification phase, the appearance of the circuit no longer resembles the original one at all.

The first concept looked like this :


Unfortunately, despite the very interesting characteristics of the digital/analog converter, in fact, the converter used was not at all linear: a real disaster.

So, I redeveloped the system by changing components and also functions. I added the possibility of choosing the possible output values.

  • from -5V to +5V
  • from 0V to +5V
  • from 0V to +10V

So I developed a second prototype corresponding to my new specifications and compatible with the euro rack format :


I wanted the board small so I condensed the component placement and also chose the smallest integrated-circuits possible. Unfortunately, this time again, an operational amplifier supposed to give a rail-to-rail output, started to 'go crazy' as soon as it reached 90% of its power supply. 

So I had to once again modify the concept and implement more 'traditional' circuits. And finally, I enlarged the circuit board because I found that the space between the connectors was not at all convenient.

Which ultimately gives me this:


And finally...

After all these modifications, tests, brain storming, I finally obtained the functional and above all precise outputs : 


The very slight imperfections on this graph come from the change in range of my multimeter and not from the voltage converter. The result is perfect!

So, I was finally able to connect one of my keyboards to this converter and test the small rack modules that I had purchased for the occasion.


Ah, the charm of analog!!! 

I therefore noticed that the VCOne modules do not all respond in the same way, and that the 1V/octave precision that they offer is sometimes completely crazy. 

With certain modules, I manage to have a coherent range over more than two octaves, with others, in particular the '3340 VCO EU' module of Electrosmith, it's total madness. I can't even get a coherent octave. The module would have to be completely recalibrated.

I now understand better why 'small' 'not too expensive' synthesizers often only offer a 3-octave keyboard, and why 61-note analog monsters like the Moog One cost so much!

I can now calmly continue programming this system, and make a front panel allowing me to install it in a eurorack location : Yesss, I see the end of it!

Later...

Yes but... With a correctly calibrated module, in my case a VCO2 from PICO, plus a little VCF and controlled by a VCA triggered by an envelope generator, all passing through a small reverb, that's for sure, despite the 'disadvantages' of analog, sound is still something special!

Later, again...

If everything goes as planned in terms of programming and I have successfully implemented everything, this is what the front panel will look like :


vendredi 16 février 2024

STMicroelectronics? As usual :-(

Almost two years ago now, I decided to leave STMicroelectronics processors to try other suppliers.

The reason? I don't really like the GUI of the STM32CubeIDE. And then also, the update system was starting to crash. And I don't like it at all.

I, 'unfortunately', intend to use a product from STmicro again for an extended version of my MSX-USB cartridge. Certain characteristics of ST microprocessors are interesting for this project.

So I downloaded and installed the latest version of the software for Windows, namely, Version: 1.14.1. The software installed without problem. : 


Obviously, the problems arose immediately, when I wanted to try a 'Hello World' on a processor from the ST32F722X range.


And yes, the system wants to install the latest version of the package specific to this processor. Obviously, this doesn't go well:


Well, as I think it is preferable, when embarking on a new project, to start with up-to-date resources. I used this legitimacy to attempt the upgrade in 'do it yourself' mode, like lets him suggest the message.

And there, welcome to the world of inconsistencies of all kinds with stupid messages, incoherent since emanating from automatic procedures which do not know what you are doing, given that you are leaving the world step by step programmed, and, as you are a human and you have no idea how this automatic procedure works, you do not know in what precise order to carry out the operations and you therefore do anything.

As a result, with each operation, the 'automatic' procedure makes progress, when something has been presented to it at the right time, without telling you, obviously, but the result still crashes. But, you have moved forward without knowing it. So, you try something you've already tried and this time, it works.

In short, all this because of update files or patches that the automatic procedure does not find when downloading, telling you tersely 'network error', while these files can easily be downloaded 'by hand' from the site of ST.

All, of course, with the crappy ergonomics of Eclipse!
ST: borring as desired.

After a... certain time..., in my case, more than two hours, I finally managed to configure two pins of a processor and start generating the source.

Another stupid thing: you can't generate the source from the processor's graphical configuration interface . 


There's no button for that. No, this is done when you save your configuration. As a result, and as all the source is conditioned by tag type comments where you must insert your code under penalty of future inconsistency between the source and the processor configurator (MX), and if after an error you wish to regenerate the source , well you need to modify a pin to make the backup possible and therefore, at the same time, the regeneration of the source.

Potentially understandable in certain conditions, but in reality, it's completely stupid and annoying.

In short: STmicro!


jeudi 15 février 2024

A flash cartridge downloadable from USB, after the first tests in real life : Ready to produce the new prototype


I also had to change the three MSX interface integrated circuits which are no longer available for assembly on a production line. 

I can't wait to receive this new prototype and make the few software modifications...


vendredi 2 février 2024

Commander X16, MSX, 8-bit Microcomputers

Since I am of a 'certain' age, I can say that for me, computing stopped somewhere between the end of the 80s and the beginning of the 90s. And yet, I worked in the 'either-called' IT field for almost 40 years. I stuck with boring IT all these years :-(

I obviously started with 8 bits, unfortunately I entered 'professional' mode at the time when 16 bits (Atari, Amiga) were starting to emerge. I found these machines fantastic compared to the IBM 'dung' and other compatible machines of the time.

I must say that for me, the computer cannot be seen as an object of mass manipulation as is the case today, but as an object allowing the expression of a certain art, and must therefore be to this service, and not the other way around.

OK, this being written...

I've long thought that 16-bit recreations would eventually create an alternative market. Actually no. A few FPGA creations from Atari STs or Amigas and then, nothing very concrete.

On the importance of community! A few years ago, I became interested in the MSX standard. Because it was the only architecture resembling a sort of 'standard', used in the world and open enough to allow a single person to create thanks to and with this type of machine. 

So I made a copy of Sergey Kiselev's MSX Omega computer. And, one thing led to another, I found myself creating material around this machine.


I also watched with great interest the videos of The 8-Bit Guy aka David Murray and his concept of a dream computer.

Wikipedia

After several years of questions, controversies and prototypes, an electronic board is finally available. At the time of these lines, this is the second version :


So I received a small package containing an order placed at the end of last year.

The content contains the bare minimum:


I must admit that I did not expect to order a PS2 keyboard and mouse more than 30 years later!

As for the motherboard, I must say that it is absolutely professional quality. I remember the first PC and PC-XT motherboard. This has nothing to do with. And I love the three ISA type connectors allowing the construction of various expansion boards.

In my opinion, this is what is missing from the MSX standard. But that can change ;-)

The Commander X16 is a machine in the spirit of the Commodore 64/128 based on 6502. The MSX is based on Z80. I think I'm going to stop at these two machines, it already represents a lot of work developing on these two platforms!

There is also the AgonLight machine, but I must say that it interests me less. It doesn't really have any means of extension. I find it too closed, but that's my personal opinion. If a new version is developed with what I consider to be the bare minimum, I might be interested in it.


In this post, I have only touched on the subject. These three machines involve the efforts of many people. I thank them here for their inspiring 'work'.